Monday 15 September 2014

3

September Showcase: Shandiin Tank and Tunic

Shandiin Kitschy Coo

I'm psyched to be part of Frances Suzanne's September Showcase today, a series showing love and appreciation for rising Indie designers.  Well, you don't have to ask me twice to show my love for Sarah from Emmyloubeedoo / Loubeeclothing!   Her earlier Hosh Pants, Doli Tank, and Bimaa Sweater patterns have been massively successful and I think her newest, the Shandiin will be too.  I love how modern and distinctive Sarah's patterns are, but completely wearable at the same time.

shandiin front close

The Shandiin Tank and Tunic pattern has two lengths (duh), narrow bias straps, a crescent cut out in the back, pull over the head or button front options, and optional elasticated puff hem.  It's intended for wovens but I used knits during testing and will unapologetically use knits forever.   There are pattern pieces for making your own bias straps but I used store-bought bias binding with a picot edge.  The upper back fabric is cotton / lycra Cherry Girls, the main fabric the most Maia-est fabric I've ever had, Waterlily.

Shandiin back 2

DAT BACK THO.

Shandiin full 2

I lengthened the pattern to a shortish dress length, and omitted the hem facings for a standard hem.  I love how the dress looks without visible arms.

Shandiin side

And also with Egyptian arms.  This is a very versatile pattern for where ever on the 'Where Do the Arms Go?' spectrum your child might fall; it suits All the Arms.

Shandiin close

Thanks so much for inviting me, Sarah, and for the great series Frances Suzanne!

For the rest of September you can save 20% on ALL Loubeeclothing patterns by using SHOWCASE20 at checkout.  Sarah has sales very infrequently so get your Shandiin pattern / all the patterns over here posthaste!

Friday 27 June 2014

6

Introducing: Jungle Ave Elephant Skyline

Jungle Ave 7

My friend Sara from Sew Sweetness has just released her first fabric line 'Jungle Ave' for Art Gallery Fabrics and it's amazing!  It's not quite yet available from shops but I believe it's imminent.  There are eight quilting cottons, two knits, and a voile.


Not only was Sara kind enough to send me some of the Elephant Skyline cotton lycra jersey to play around with but she sent me enough to make several things....

Jungle Ave 3

Two dorks for the price* of one!

Jungle Ave 4

My pics really don't do this fabric justice, not only are there elephants and psychedelic swirls, but there also really amazing doodle-y skyscrapers.


The colour palette is a fantastic petrol, light blue, turquoise, apple green, light apple green, black and white.

Jungle Ave 8

My dress is a pattern I've been working on for awhile.  It has a scooped V-neck and fully lined bodice, curvy waistband, and A-line skirt.

Jungle Ave 6

I drafted a similar but not-too-similar dress for Maia with this fabric in mind. Same V-neck fully lined bodice, but a less exaggerated and more girls'  body appropriate waistband.  I kinda love it!

Jungle Ave 5

Particularly the backs!

Jungle Ave 2

The fabric is a delight to sew- it was stable with no curling edges, smooth and soft, and it has excellent drape.  A true winner in both design and manufacture!  I wish Sara and Art Gallery fabrics success with all their collections (there are two further collections from Sew Caroline and April Rhodes) and if you want to get your hands on some fabric I suggest you do so as soon as they are released as they're limited edition.


*Actually, this fabric was sent to me as a gift.  Two dorks for free!  All opinions my own honest thoughts.


Sunday 22 June 2014

15

Tutorial: Convertible Braided Strap Sundress

Sundress Kitschy Coo Cover

I'm up today as part of 
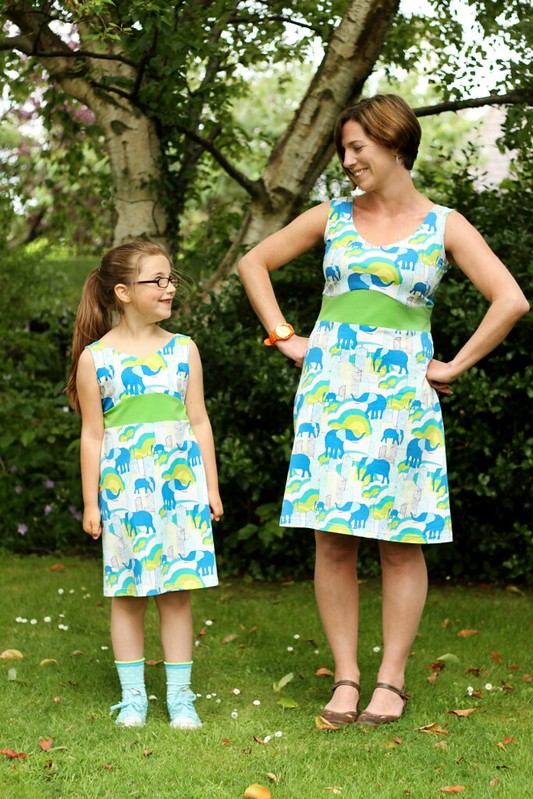
Melly Sew's 30 Days of Sundresses series with a super cute and versatile braided strap dress.  This is my second year participating (last year's is here), make sure you check out the rest of the contributions on Melly's blog!


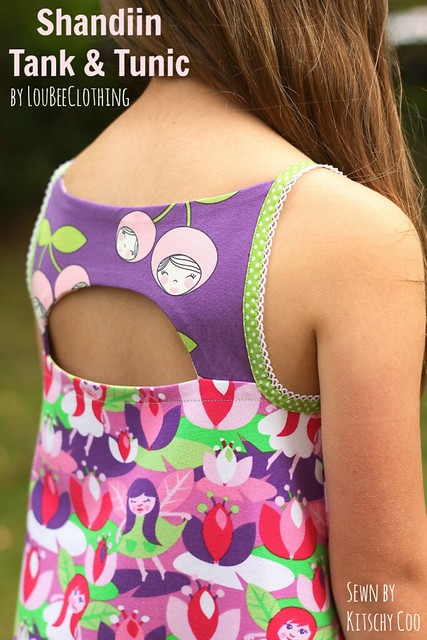
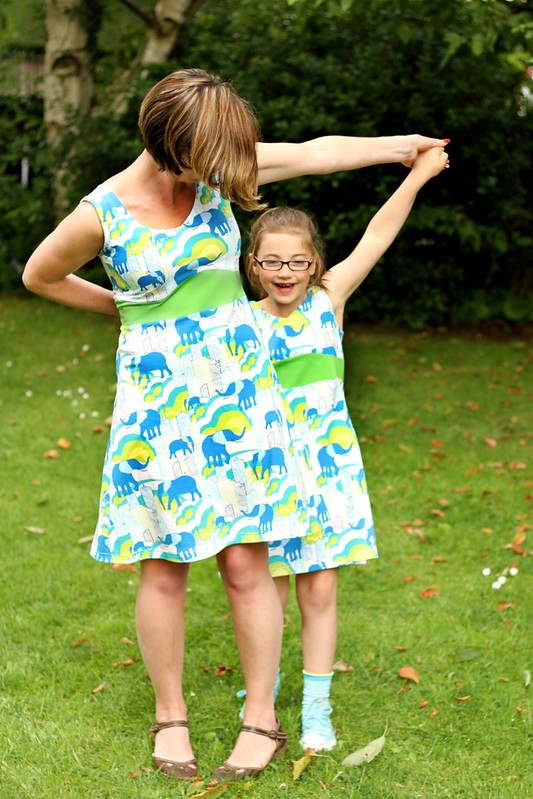
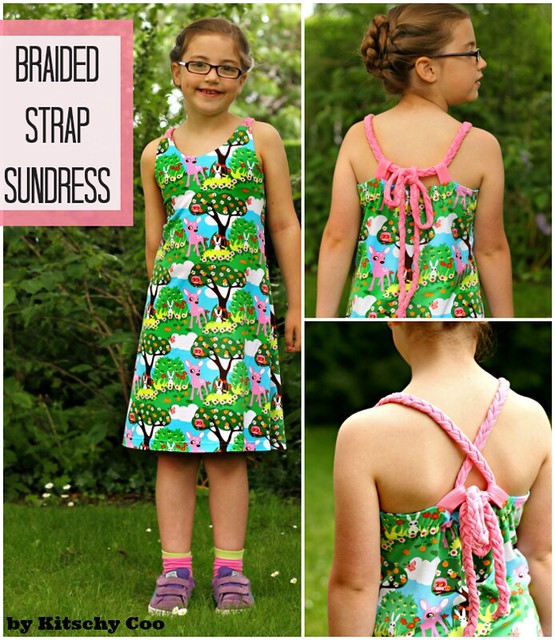
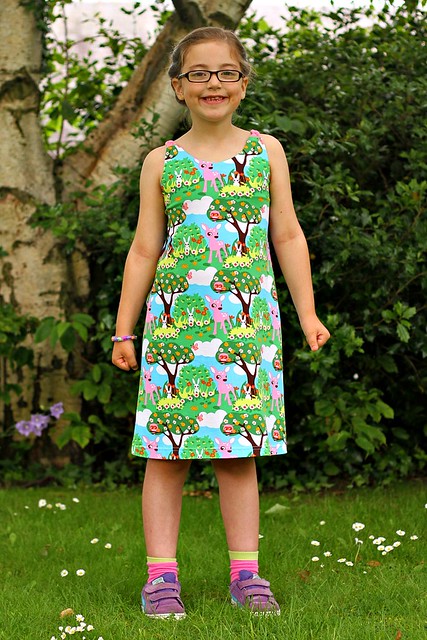
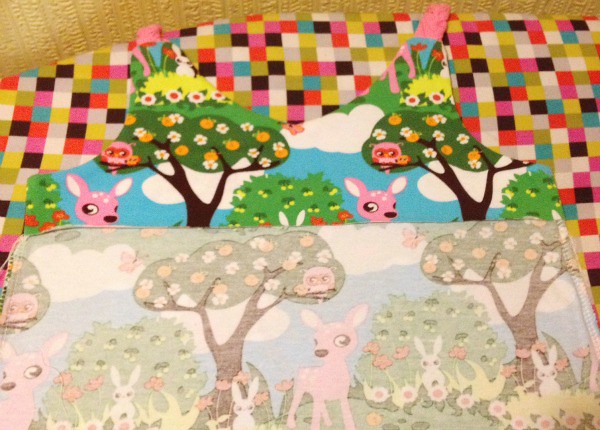
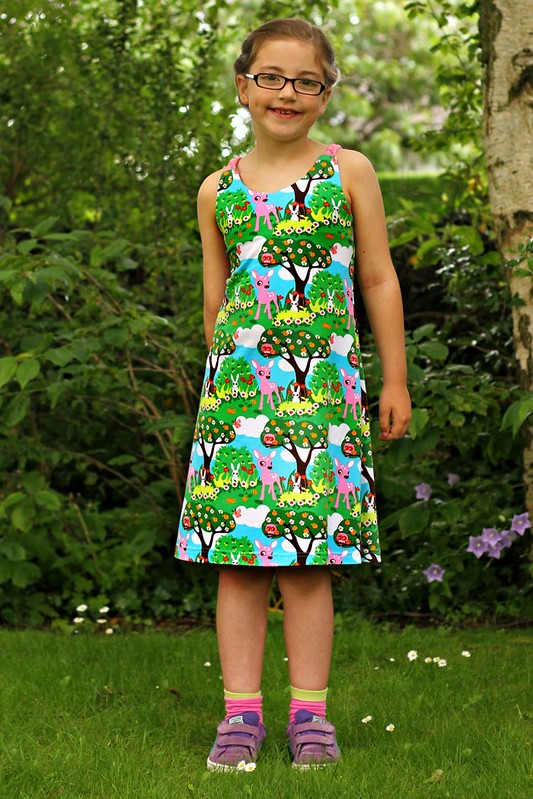
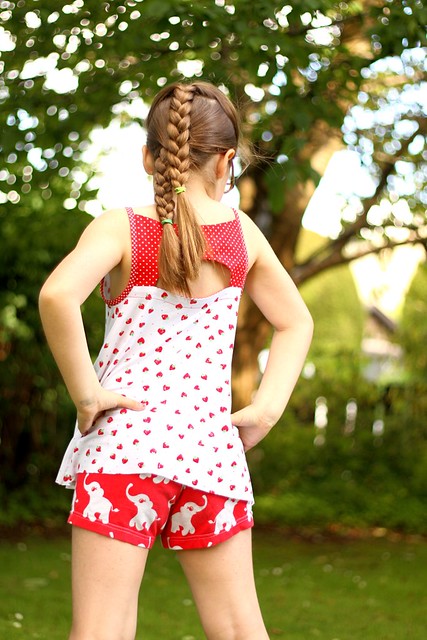
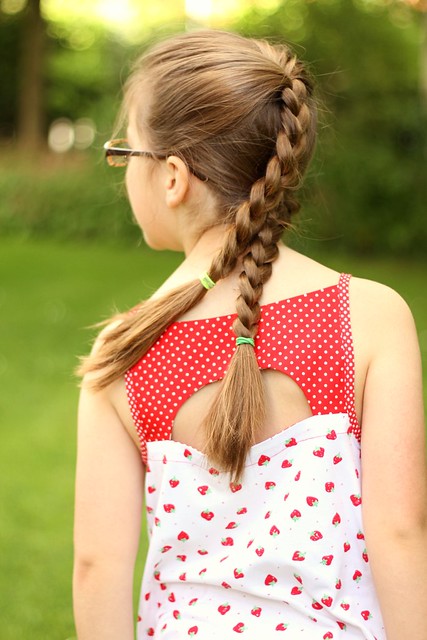
The sundress has a slight V-neck, a slim a-line shape, and two long braided straps.  With various ways to tie the straps and the elasticated back I think Maia will be sporting this dress for several summers.

front 1

I'm offering the pattern download for this specific size for free 
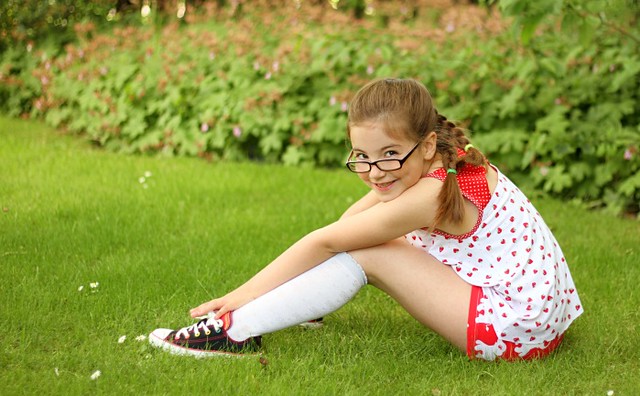
HERE, it has finished garment measurements of 27" chest circumference, 29" shoulder to hem length and hits my sturdy and tall 7 year old just below the knee so I'd loosely deem it size 7 to 10 years old.   If you're wanting a size different than that, it's not that difficult to draft a different size using a well fitting tank top as a starting point.  This dress is made out of knits because I am me, but it should work for wovens too (although you should use a knit, ribbons, or something else that won't fray for the braids).

printing and piecing

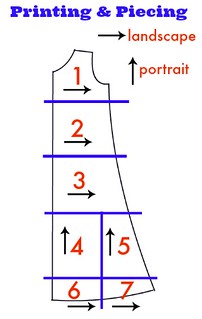
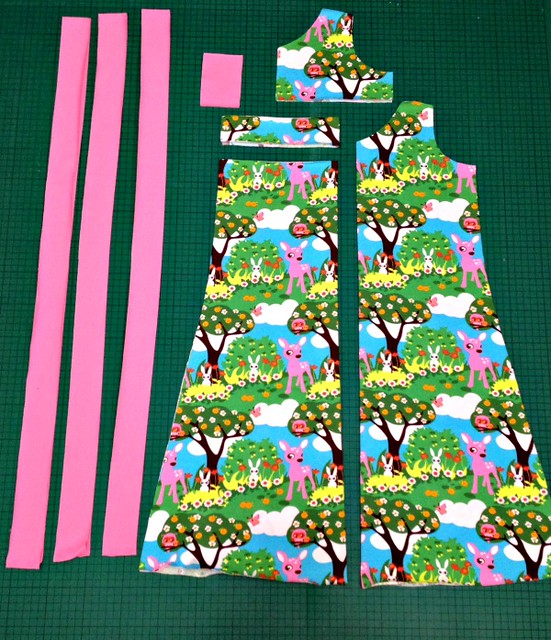
The royal blue lines are where you cut and piece to the adjacent pieces. I've nested the Front, Back, Front Facing, and Back Facing so you only have to print 6 pages.

Braided strap sundress pattern key

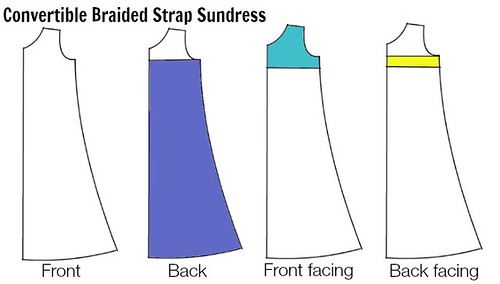
All of the cutting instructions are written on the pattern, but in case you can't visualise what I'm talking about regarding how the Back, Front Facing, and Back Facing relate to the Front piece, this diagram should help!

1 cut pieces

Cut your pieces: one front, one back, one front facing, one back facing, two tabs, and six strips for braiding.

2 braid straps

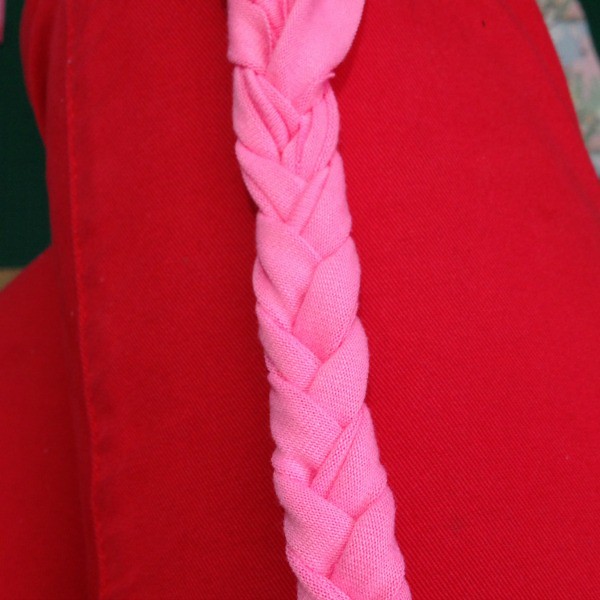
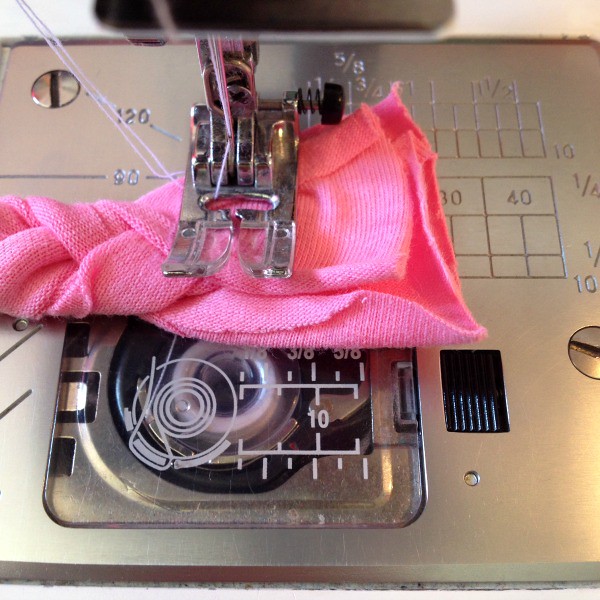
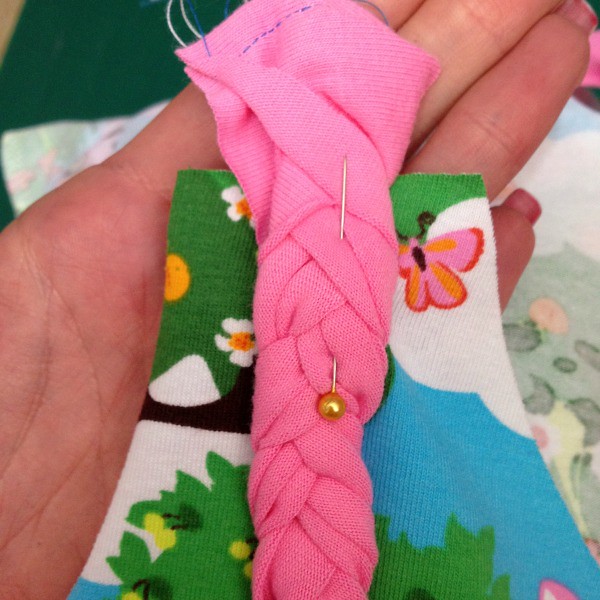
Sew or pin the ends of three braid strips together.  Start braiding the strips. At the very beginning you should braid loosely so it's more-or-less flat; it'll be easier to attach to the dress if it's not tight and thick.  Continue braiding until you get to the end.

3 secure ends

Secure the ends.  Repeat for other braid.

4 sew tabs

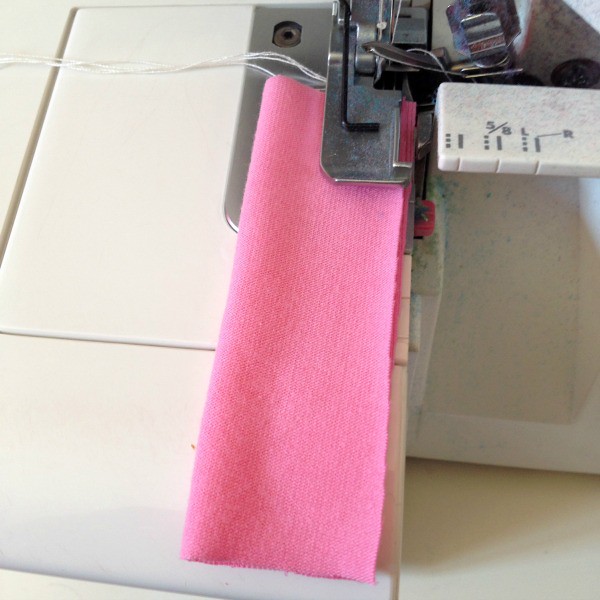
Right sides facing, fold a tab in half vertically and sew.  Repeat for other tab. Turn tabs right side out and press well so the seam is in the centre.

5 side seams

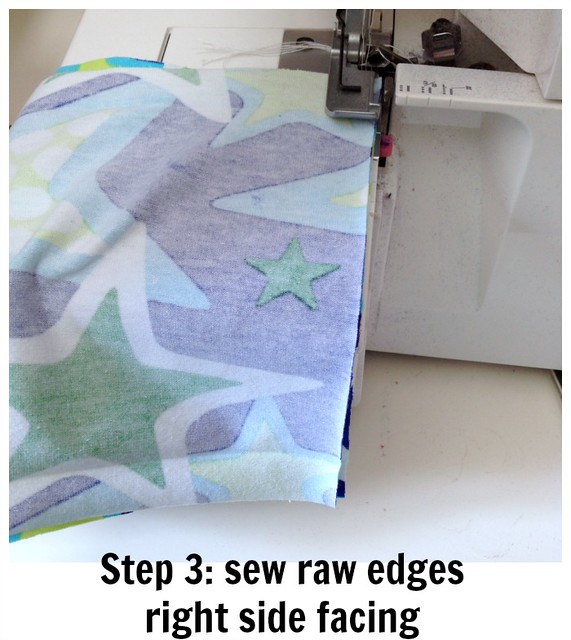
Right sides facing, sew the side seams of the front piece to the back piece. Right sides facing, sew the  side seams of the front facing to the back facing.  Optional: finish the bottom edge of the facing.  I didn't because I was using a knit.  This is what you should have so far.

6 pin tabs

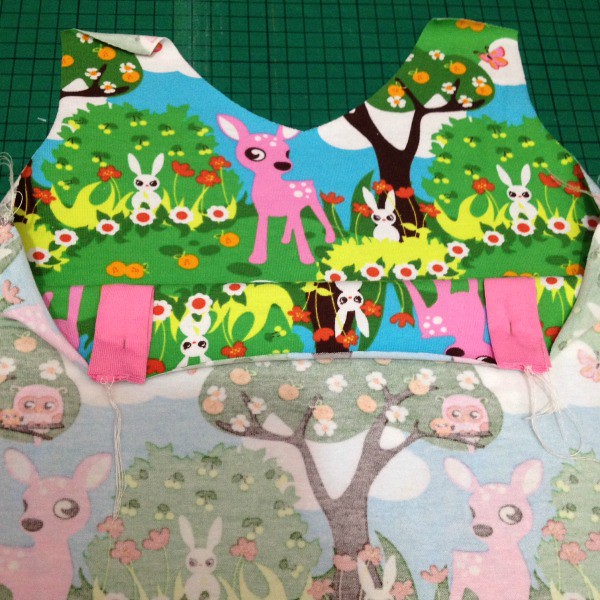
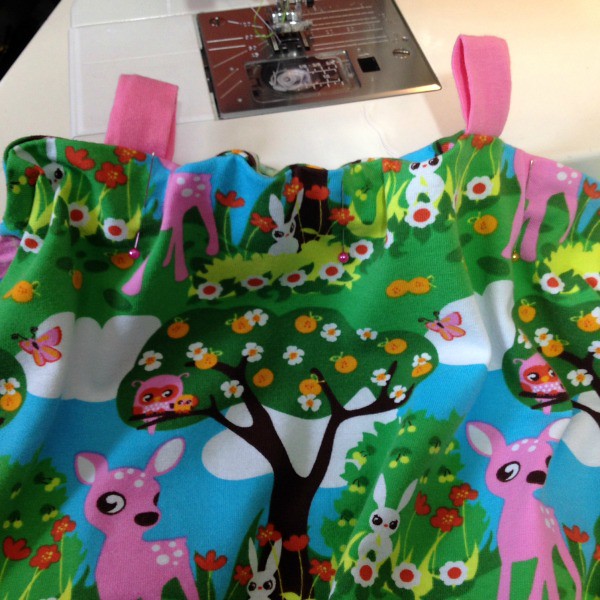
Fold a tab in half and pin in position on the back of the dress facing down.  Baste in place within the seam allowance.  Repeat for other tab.

7 pin strap

Pin the flat-ish end of a braid to the shoulder making sure it's in the centre and away from the seam allowances.  I pull the strap up and over the top edge so I'd still be able to clearly see it after the facing is pinned on top.  Baste in place.  Repeat for other strap.

8 pin facing

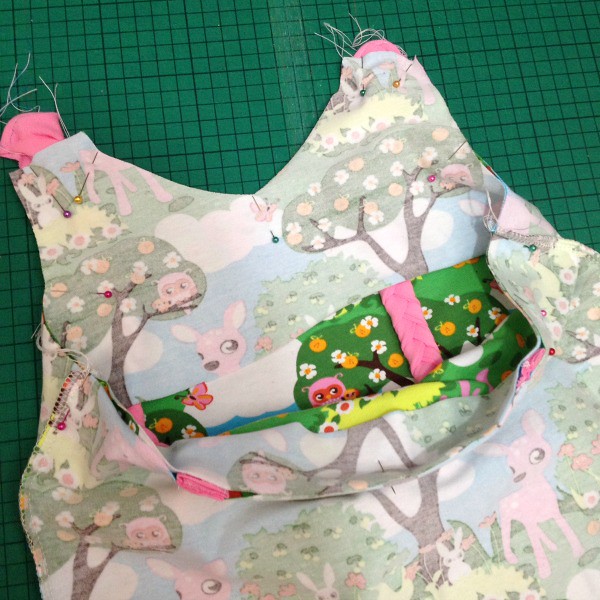
Right sides facing, slip the facing over the dress and match the raw edges all the way around.  Pin regularly.  This is how it will look.

9 approaching strap

Starting at a side seam, start sewing across the back edge, over the side seam, and up around the arm curve.  When you get to where the strap is, use your fingers to make sure you are not catching any bit of the braid in the stitch, and sew as close to the strap as you can.  Pivot and sew the top edge of the strap, pivot and sew down towards the neckline, again using your fingers to make sure the strap isn't going to be caught.  Pivot at the V and repeat the same process for the other side until you get back to where you started.

9 clip V

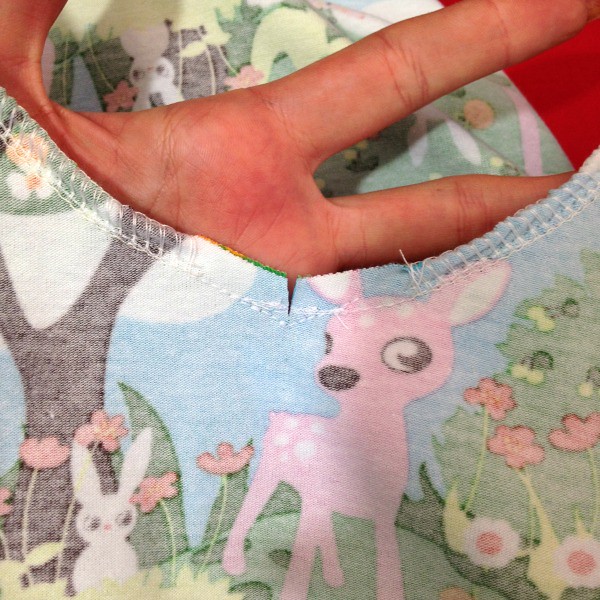
Clip a notch into the V but don't cut the threads!  You can see that I added some stay-stitching within the seam allowance as well to give the V some extra stability.

10 press facings

Flip the facing towards the inside of the dress and press everything so that it lies flat. I roll the facing slightly towards the interior so it's invisible from the right side.

11 position elastic
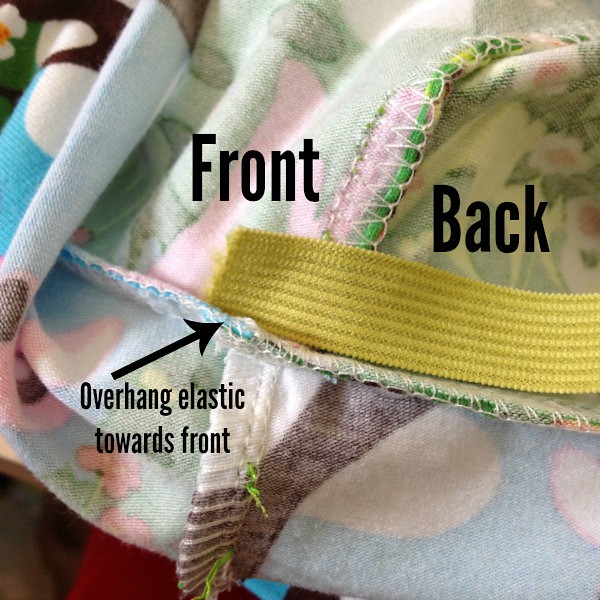
Cut a piece of elastic two inches shorter than the width of the back piece.  Flip up the facing and pin one end of the elastic about 1/4" towards the front side of the side seam of the dress.  Pin from the right side of the dress and not in-between in the wrong sides between the dress and facing or you could have trouble getting your pin out later!

12 stitch in the ditch

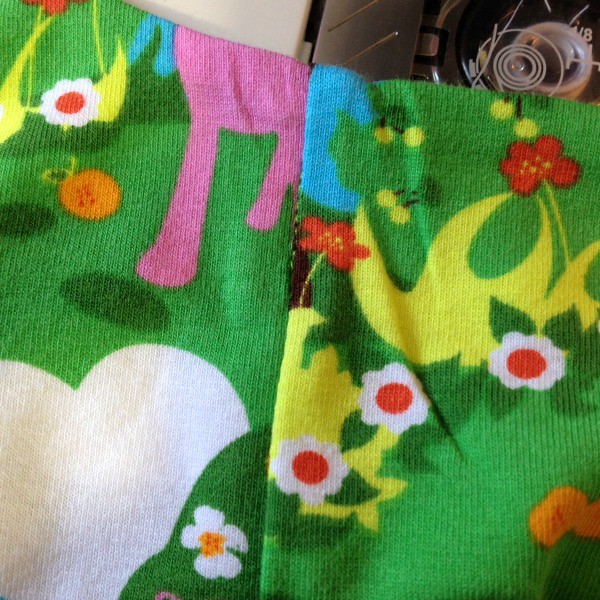
Flip the facing back down and ensure that the two layers still match up on the side seam.  From the right side of the dress, stitch in the ditch (on the side seam).  This will catch the dress, the facing, and the elastic in between.

13 stitch in the ditch after

Repeat the process with the other end of the elastic in the opposite side seam. See how it's nearly invisible!

14 pin layers for chanel

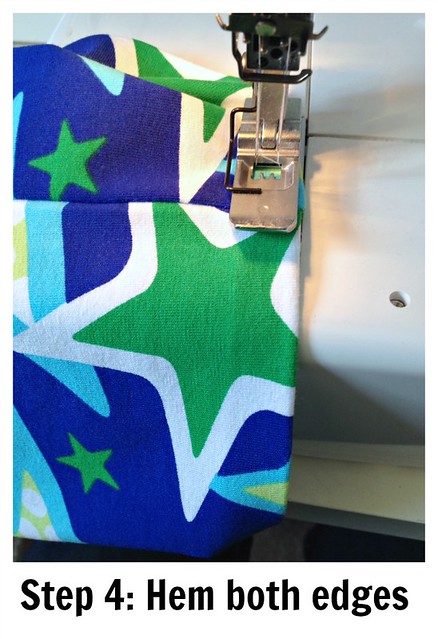
Stretch the back of the dress so the elastic and facing are sitting flat and pin the layers together.  Make sure the facing is still sitting neatly underneath, and that the elastic is up near the top of the channel away from where the channel stitching might catch it.  Starting at one side seam and heading across the back of the dress, sew the bottom edge of the facing to the dress, ending at the opposite side seam.  You now have a casing for the elastic.  Press and hem the bottom edge of the dress and you're done!

front 2

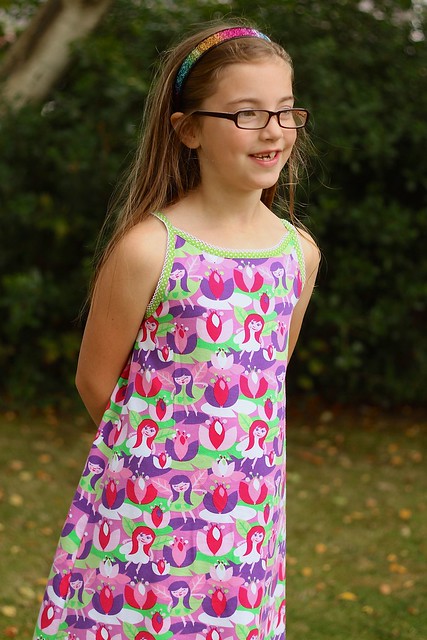
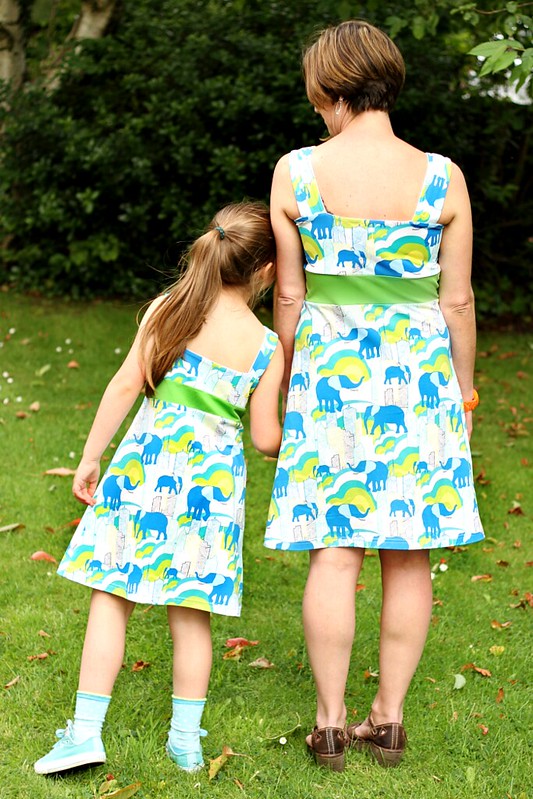
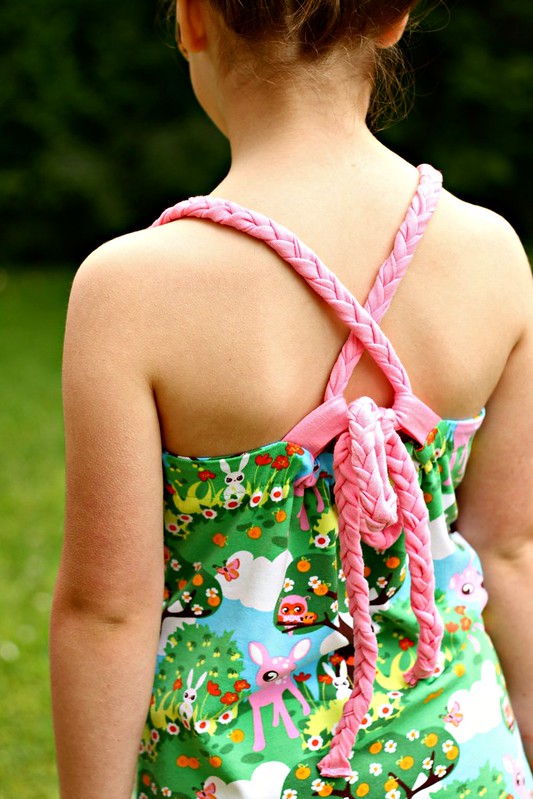
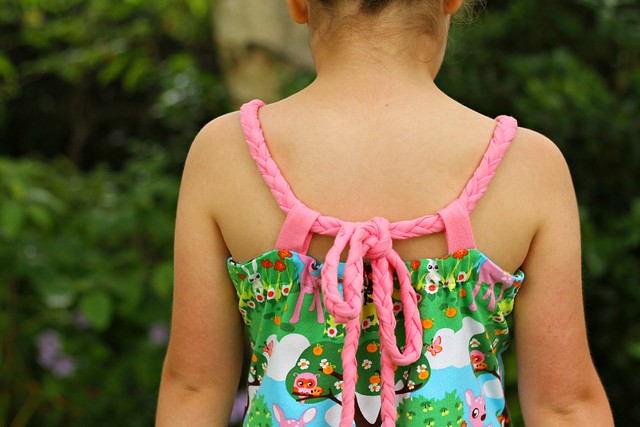
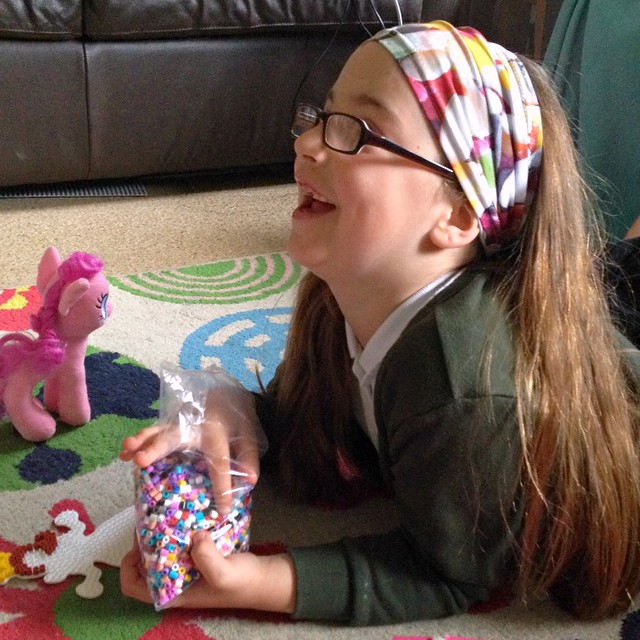
You can tie the braids crossover...

cross back

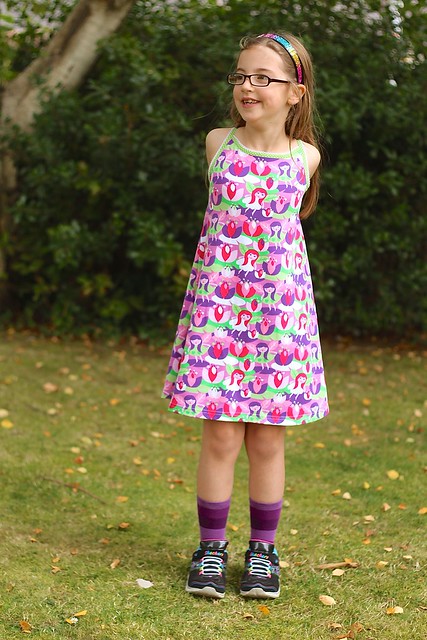
Or over the shoulder and through the tabs...

straight back close

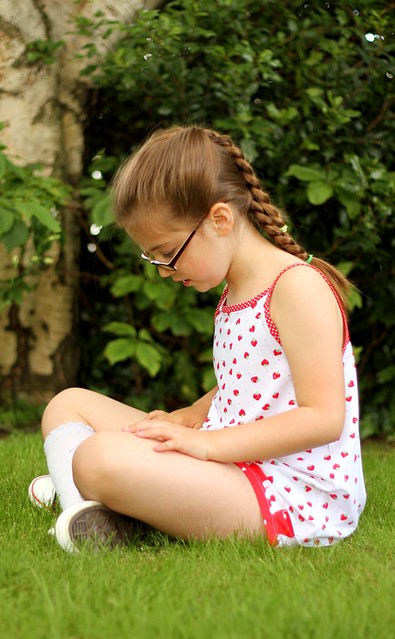
And probably a bunch of other ways as well.

Make sure you check out the rest of the Melly Sew's 30 Days of Sundresses series for great inspiration and free patterns and tutorials!


Friday 13 June 2014

12

Style That Kid! Yes, please.

Style that kid Kitschy Coo

I'm really excited to be on the virtual book tour for Alida Makes's new 'Style That Kid!' e-book today.  Styling (or lack thereof, haha) is something I really struggle with in my pictures.  I've a made a real effort in the last couple of years to up my photography game- everything from a new camera and lens to photography courses and workshops- but although I can say my pictures have improved technically I'm still disappointed a lot of the time with the results.  I'd even go so far to say that's one of the reasons my blogging has slowed down as the internet can take only a finite amount of my family standing in our garden being basic.


Alida to the rescue!  This is a great book that supplements technical photography skills with the more amorphous harder-to-learn (for me, anyway) understanding of how to make your photography more compelling and stylish.  She covers everything from the pre-shoot prep stage like choosing locations and props, to all the things you should consider during a shoot like positioning and contrast, and even post-shoot photo editing.   So armed with my new insight, I stepped out of my comfort zone to shoot one of the Shandiin tanks I made for summer.

style 8

Just kidding, still in my comfort zone / garden.  This is a picture to illustrate how I would normally take an outfit shot.  Straight on, clean outfit lines, conscious to show the pattern and fabric uninterrupted.  Nothing terrible, but also not very interesting.

style 7

Same for the back view- standard fare from me.

style 5

Except! With Alida's section on texture in mind, rather than throw her hair up into a messy ponytail as I would normally I introduced some visual interest and contrasting texture with double braids.  I think it better highlights a back as awesome and unique as the Shandiin's.

Okay- real talk.  This is going to sound ridiculous, but making Maia do anything other than stand was hard for me.

style 1

(Inner monologue) Why would she sit like that in the garden?!

style 2

But you can't see the lines of the top!

style 3

You can't see the outfit at all!  

This book really challenged me to think about things differently and opened me up to trying new things.  Breaking out of a long-established-and-safe photo routine is a big achievement for me, even if it's baby steps from the outside.

style 4

Next up is to try using some props (well, after acquiring said props).  It's something I really love when others do but without the book would've been too scared to try.

style 6

A massive thank you to Alida for writing a great book and having me on the tour!


You can purchase your copy here but Alida is also offering five copies of the e-book in a giveaway:
 a Rafflecopter giveaway 


Monday 19 May 2014

5

Tutorial: 10 Minute Exercise Headband

Headband tute

Since taking up running again, I've had to battle with how to keep my hair out of my face now that it's too short for a ponytail.  Big, fat headbands are the solution! They're tall enough to keep all my hair from blowing forward into my face (and also cover my perennially cold ears), but thin enough to scrunch up under my hair at my neck without being bulky.  Have a lot of knits scraps? Have unruly, pesky hair?  Have ten minutes?  Let's go!

Fabric requirements: You really need fabric with lycra in it so that it will not only stretch but recover enough to stay on your head firmly.  Interlock and 100% cotton jersey are a nope.

Headband tute

On the fold, cut your fabric so that it is 24cm wide (48cm unfolded) by 17cm tall.

Headband tute

Press the raw edges towards the wrong side by 2cm.

Headband tute

Right sides facing, sew the 17cm tall raw edges together.

Headband tute

Hem the long edges that you previously pressed in step two.  I'm using a coverstitch because I'm lucky enough to have one, but you can also use a twin needle in a regular machine, or any other stretch stitch that will stretch without breaking.  That's it!

headband on

Optional but not recommended: Have a child steal it.