

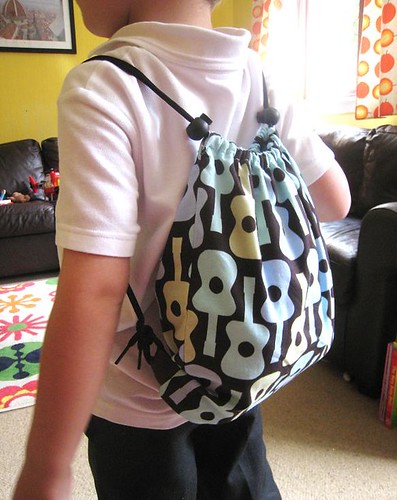
Because Sew Scrumptious asked so nicely, here's a tute for the drawstring backpack that I made for Jamie's PE clothes.
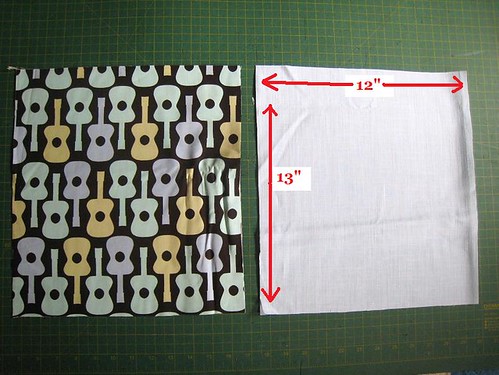
Cut two 12" by 13" pieces of outer and lining fabrics.
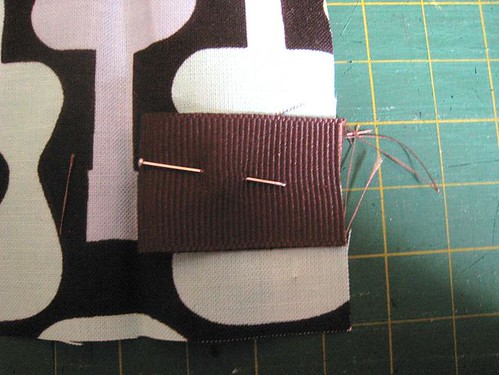
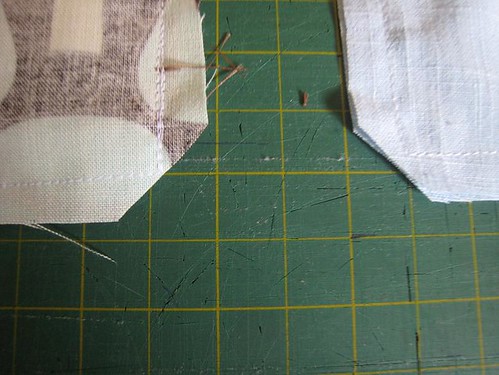
Cut two 2" pieces of ribbon (I used grosgrain), fold in half and pin one inch from the bottom corners with the raw edges of the ribbon against the raw edges of the fabric.
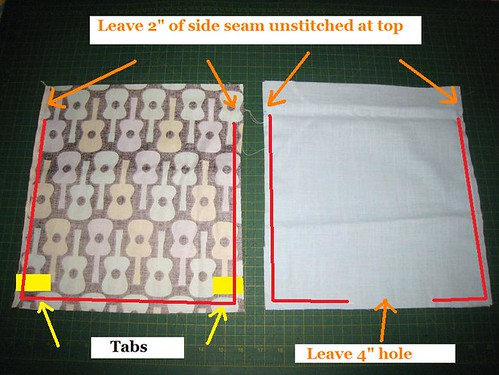
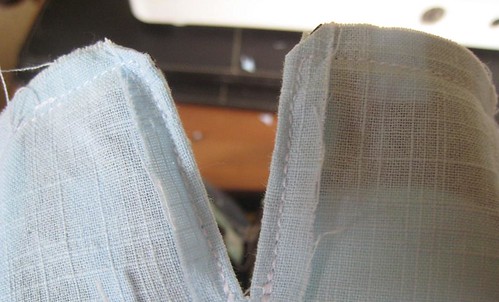
With right sides facing, sew the outer fabrics together and then the lining fabrics together as per the red line. Leave two inches at the top unsewn for both (making sure that they are exactly the same distance or they won't match up!) and front and back stitch several times here because this point will be under pressure. Also leave a four inch opening at the base of the lining bag.
Clip your corners.
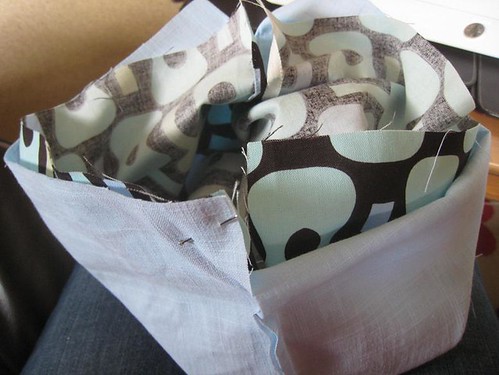
Turn your outer bag right side out and place it inside the lining bag so they are right sides facing. Pin them together along the top edge.
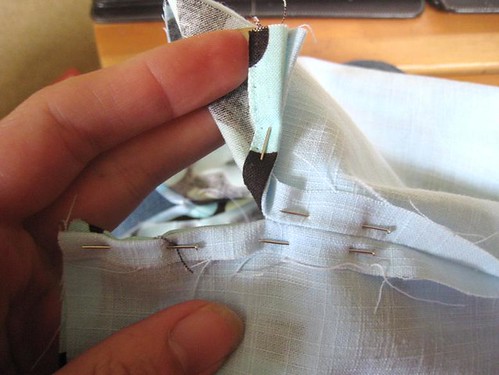
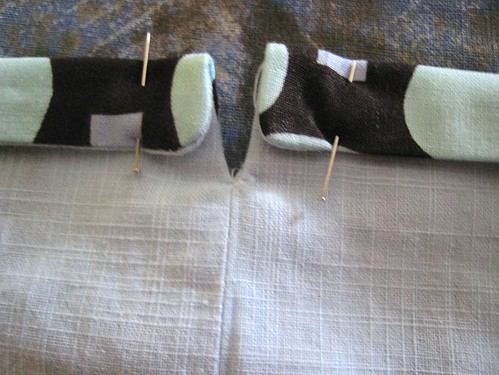
At the unsewn slits at the side seam, finger press the seam allowance down and pin together. Press with an iron to make sure they match up.
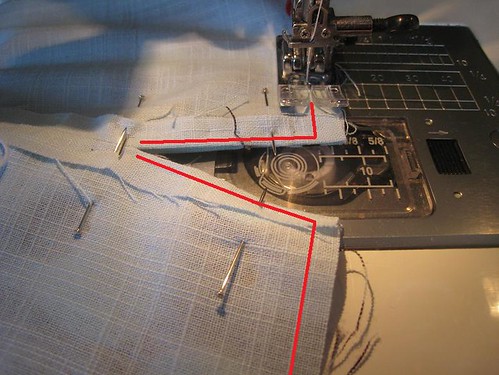
Starting just before the slit, sew the bags together using your normal seam allowance (I use 3/8"). Along the slit, switch to a narrow seam allowance, right along the edge. Stop exactly at the base and secure your stitches, snip, lift up and start a new stitch exactly at the base on the other side. Italics used to denote a date with your seam ripper if you stitch further down or too far away from this point. Ask me how I know. Continue along the top edge and do the same at the other slit til you get back to where you started.
Clip these corners.
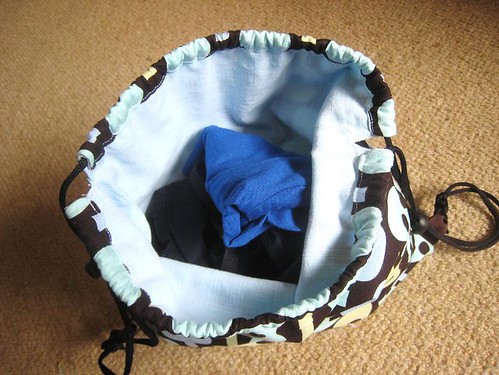
Reach through the hole in the lining bag and pull the bags right side out, pushing the lining bag into the outer bag. Press with the iron and poke your corners out so they're nice and square. Fold down 3/4" of the top edge to the inside of the bag and press in place.
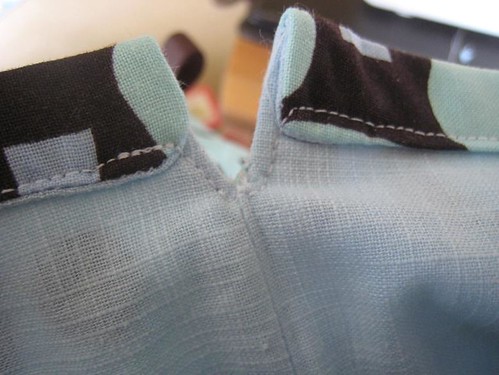
Stitch the fold down close to the edge, and also topstitch around the slits.
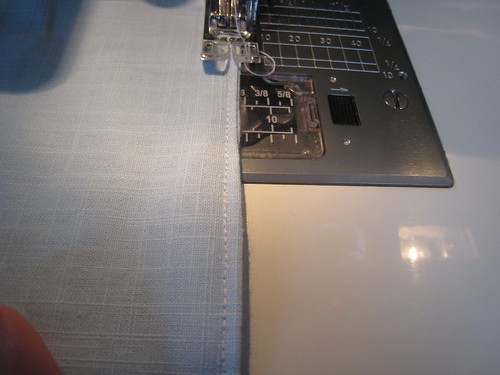
Press the bottom edge of the lining bag at the opening so the raw edges are neatly inside and then sew close to the edge to close the hole.
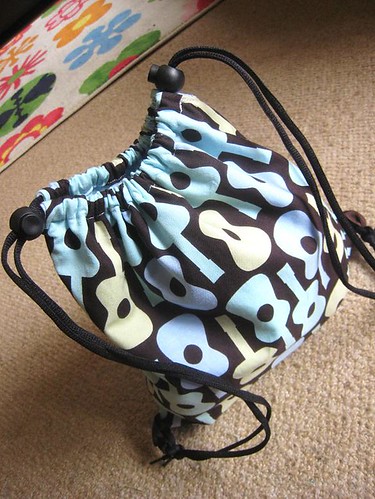
Run a length of cording (I didn't have any so I used shoelaces!) through one channel and an identical length through the second channel. If you have toggles I recommend putting them on at the right and left sides, holding both cords together. Determine the length that suits your child, thread the cording through the tab at the bottom corner and tie in a knot to secure.
Put stinky gym clothes / shoes in and ignore. You're done! Don't forget to post in the Flickr pool if you make one :)
Great tutorial! I love these drawstring backpacks for my boys. They use them for PE, playing outside, sleepovers, all sorts of things. Thanks for sharing!
ReplyDeleteAhh this is soo cute. Great tute.
ReplyDeleteEmma x
That's brilliant!
ReplyDeleteI think I LOVE you!! Thank you so much for the tutorial. Izzy is going to be so happy. Will make this over the next week or so and blog about it with a link. Very happy!!
ReplyDeleteAwesome! I always see these around and think, "That would be so easy to make - I should figure it out." but of course, am far to lazy. That's for enabling my laziness!
ReplyDeleteI meant "Thanks" for enabling...
ReplyDeleteApparently I should proofread prior to clicking publish.
I know this might be a stupid ? but why did you leave a 4" hole?
ReplyDeleteSo you can pull it right side out :)
DeleteFind your tutorial via Pinterest, and I just finished my daughters backpack. Thank you very much for sharing, your instructions were very clear and easy to follow. My girl love her new gym bag. :D
ReplyDeleteGreetings form Hungary.
Just used this tutorial to make a PE kit bag for my daughter - very easy to follow and nicely finished around the cord binding! Thank you very much
ReplyDeleteAnnie
Brilliant tutorial thank you!! I've made two of these in the last 48 hours... Couldn't fit the track suit in the first one so made another a smidge bigger. My little one loves them both and her sister is now requesting one :)
ReplyDeleteThanks,
Ali x
Hi Amanda,
ReplyDeleteThankyou so much for sharing this tutorial. Infact I followed your stepas to create a gym bag for my husband and he loved it .
I have posted a tutorial in my blog and have linked back to you.
Tc.
nichuspace.blogspot.in